Sunday, 19 May 2013

Week 11 – Happy World Baking Day!

Salted Caramel Cupcakes

As I said in my previous post, I had this week off, so intended on trying something a little more complex.  I also found out earlier in the week that today, Sunday 19th May, is World Baking Day!  So I thought that despite having the whole week to bake, I would wait until today, to make my endeavour more global, in keeping with the fact this blog is on the World Wide Web.  The official World Baking Day activity was to pick something from the website according to your baking ability, however nothing from any of the abilities really screamed out ‘bake me!’ so I thought I’d stick to the book, literally.  But then I had the dilemma of what to cook.  As I was going to be baking today, and I already had plans for earlier, the recipe could no longer be too complex, so I decided to go for Salted Caramel cupcakes.  This week has been quite a caramel filled week to be honest – while in London on Wednesday my sister and I called into Paul A. Young chocolate shop in Soho, and he makes amazing salted caramel chocolates.  We then had Salted Caramel Carte d’Or ice cream on Friday, and today in Starbucks I tried the new Triple Caramel Frappuccino (in stores tomorrow I think).  That drink has put me on a sugar high all day!  So really it was a natural decision.
The bake

The cupcake sponge itself is basically a chocolate cupcake, and the salted caramel part comes from the filling and the frosting.  For the cupcake bake, I am following the ingredients to the letter!  Except for using skimmed milk instead of whole milk.  Often with cake/sponge recipes in the Hummingbird cookbooks, you cream the butter and sugar together first, then add the dry ingredients, but in this instance you added all the cupcake ingredients, minus the milk and eggs, into a bowl and mixed until they resembled crumbs:

 
You then mixed milk and eggs in a jug, and gradually added it to the bowl, until you had the cupcake mixture.  And that’s it!  Definitely not complex, sorry guys!  I decided to use muffin cases rather than my usual small cupcake cases, and as a result the batter filled the 12 cases exactly.  However, turns out I overfilled – can you see how the cakes have spilled over the sides!  So although it did mean I didn’t have to do another batch, next time I would fill the cases halfway rather than two-thirds/three-quarters of the way.  So that they would look more uniform once I’d put the frosting on them, I cut off any edges that went beyond the standard cupcake shape, and put them to one side (I hate waste!).

Once the cakes have cooled completely, you add the first caramel element to the cupcake.  I’ll say now that the recipe asks for dulce de leche, or caramel sauce.  My local large supermarket didn’t have what I was looking for (turns out every little doesn’t always help), but thankfully my mother had an opened jar of caramel sauce that she’d picked up from Aldi once.  Aldi no longer had the sauce in question.  I have definitely seen dulce de leche in a supermarket before, so it’s probably worth just keeping an eye out!  Anyway, to add the sauce to the cake, you employ the same method as I used when adding the orange marmalade to my Jaffa Cake cupcakes.  That is, to cut a circle in the cupcake with a sharp knife, take that bit out, fill the gap halfway with caramel sauce, then replace the bit of cake in the hole.  The cake does need to be level, so I tend to cut half of the sponge bit off.  I added that to my pile of cupcake edges from earlier.  The trick with putting the cake bit back in is to make sure you’re putting it back in the same way it came out, so the cake looks like it hasn’t been touched.  As you then add frosting it doesn’t matter aesthetic-wise, but it does make a level cupcake!

 
Then it’s time for frosting.  As noted in previous blogs, Hummingbird recipes tend to require a lot of icing sugar (670 grams for this one!) so as usual I halved the quantities.  It’s a standard buttercream, so you add icing sugar, softened butter and milk, then add some dulce de leche, and some sea salt!  This is where the salt comes in.  The recipe says ‘a pinch’, but maybe add a little bit at a time, and taste.  I put my definition of a pinch in, but found I couldn’t taste any salt at all, and although I know it should be a subtle complement to the caramel, it’s no good not being able to taste it at all!  So I added a little bit more.  Once they’ve all been frosted, swirl a bit more caramel sauce on top, and a small sprinkling of the sea salt.
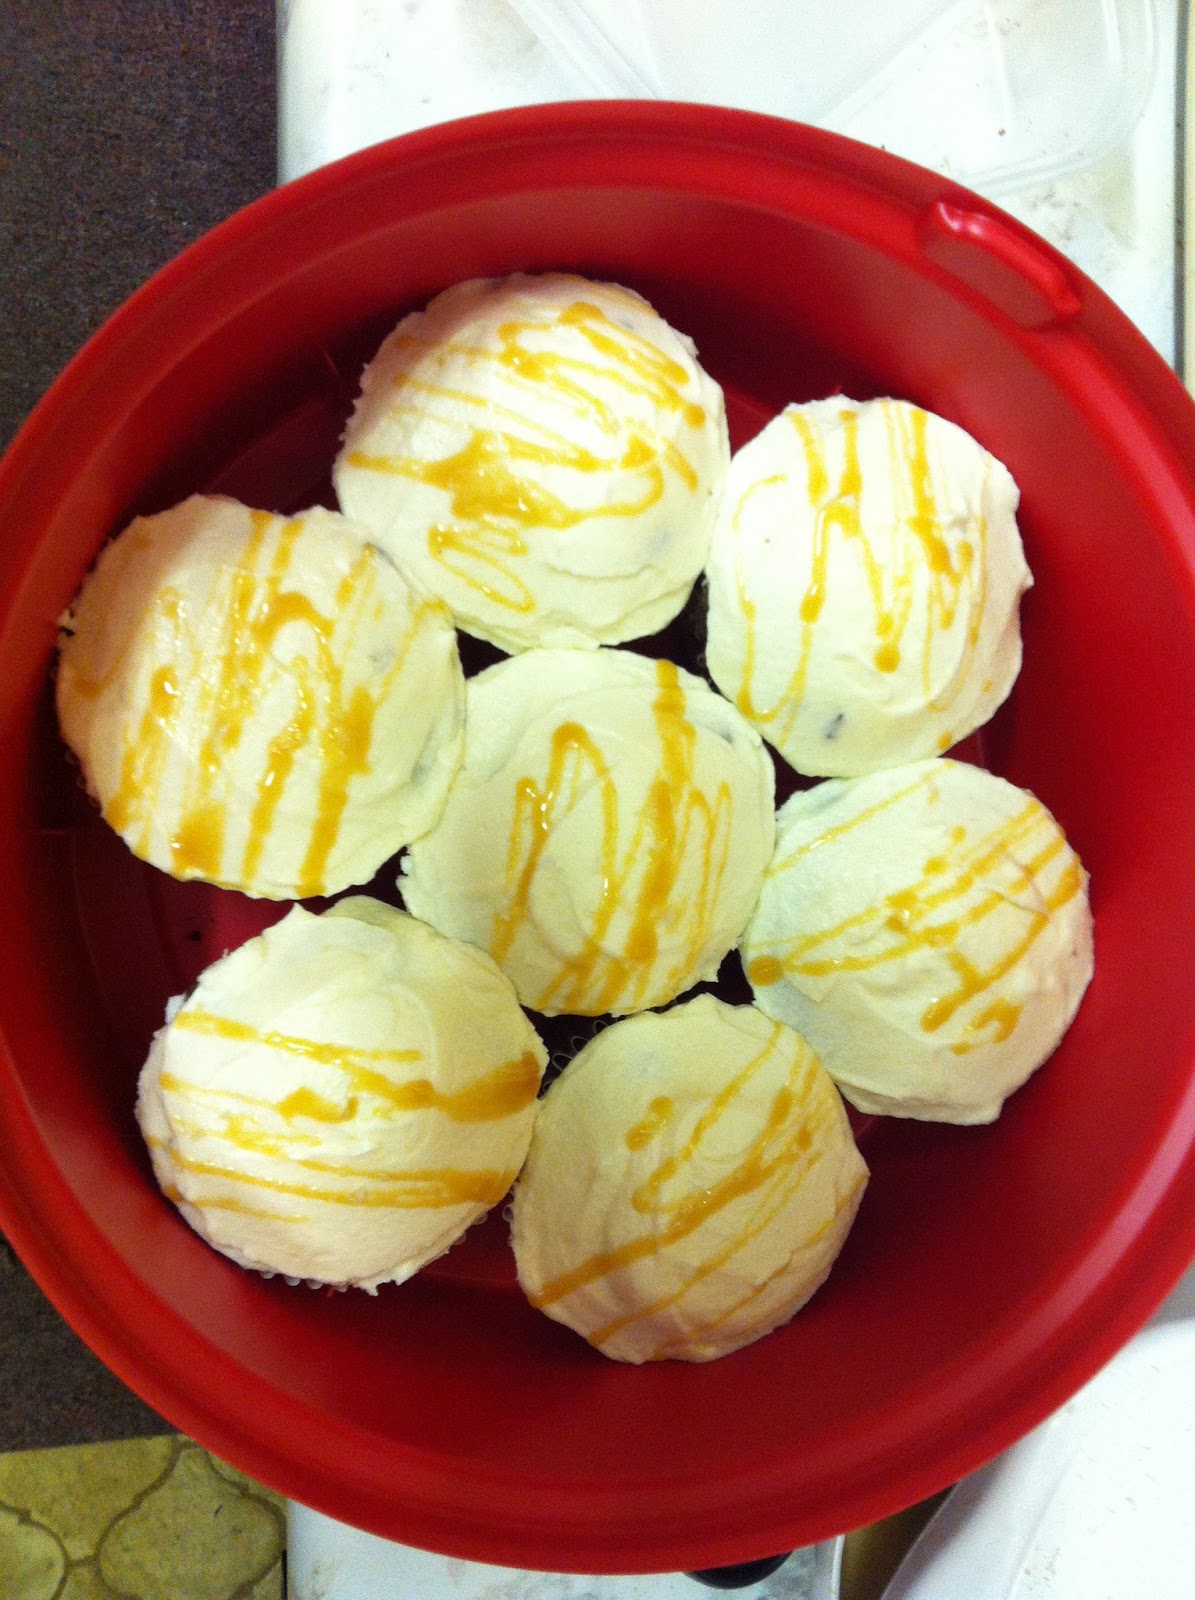
Voilà!  Don’t they look great?  I’m not the best when it comes to decorating the cakes, and need to hone my palette knife technique, however by adding the swirl of caramel on top it gives them quite a sophisticated look!  Unfortunately I haven’t had a chance to taste one yet – I’m still on a sugar high, and it’s almost 11pm so if I have one now I’ll never get to sleep… However, I have a bit of a treat in store for you – as I said I hate waste, and have enough sponge offcuts and excess frosting to attempt cake pops!  So once I’ve made those I’ll share my method/results with you, and by then I will have definitely tasted a cupcake.  Ooh so much suspense!  So until then, happy baking!

Sunday, 12 May 2013

Week 10, C is for cookie. And cornflake. And chocolate…

Cornflake Cookies

My choice for this week comes from a leftover ingredient from a previous week – malt powder!  It wasn’t an intentional choice, but I bought a big jar of it for the Chocolate MaltCake, and still have a lot left.  And although you wouldn’t think so, these cornflake cookies contain malt powder(as well as chocolate)!  I can’t think of many other recipes that will help me use it up… I also wanted quite a simple recipe.  The last time I made cookies, I overcooked them a little, so my aim this time was for a soft cookie, but with a little bit of a crunch from the cornflakes.
The Bake

First of all, my amendment to the recipe is halving the quantities.  It wanted 400 grams of flour for the cookie dough, but I only had 300 grams.  The recipe consists of two main parts – preparing the cornflake mixture, making the cookie dough, then merging them for the final cookie mix.  You might think that you could just add cornflakes straight to the mixture.  But you’d be wrong.  You actually mix cornflakes with malt powder, caster sugar and salt, then coat in melted butter, and bake the mixture for 15 minutes, or until the mixture is ‘crispy’.   My end product, however, looked a bit like a giant Anzac biscuit.  Once it cooled I prised it from the glass tray but it still wasn’t crispy, more gooey. 

While the cornflakes were baking, I made the cookie dough, which is a standard cookie dough mix, with chocolate chips added.  It was all very simple.  I then added the cornflake mixture to it.  The recipe said to use two tablespoons of dough for each cookie, but for the first batch I used an ice cream scoop.  As a result I only had 5 cookies on a tray when I put them in the oven for 15 minutes.
 
As you can see, the cookies are quite big!  So they weren’t adequately cooked after 15 minutes.  I wanted them soft, but not raw!  So back in they went for 5 more minutes.  For the second batch I used a dessert spoon, to get smaller cookies which would cook faster! (I was running late for badminton…)  These turned out more like what I had in my head.

The cookies are really soft, even when cooled, and still so a few days later.  The chocolate cookie element tasted really good, and the chocolate chips had melted a little, giving a smooth, rich flavour, but the cornflake detracted from the taste more than anything.  As the cornflakes weren’t crispy, there wasn’t a texture contrast, and there wasn’t a distinctive taste, so it had no real purpose!  So although the cookies disappeared quite quickly, I think next time I’ll just make chocolate chip cookies.  I’ll have to find some other recipes using malt powder!

I have a week off next week, so hopefully that will lend itself to an interesting, complex and time consuming bake.  Until then, happy baking!

Sunday, 5 May 2013

Week 9 – S’more, s’more!

S’more Brownies

This week my only pre-requisite for choosing the recipe was to ‘make something my sister likes’.  This task isn’t as simple as it sounds as she is very fussy about food.  And has a nut allergy.  It’s surprising how many of the recipes in Home Sweet Home contain nuts.  She also doesn’t really eat fruit, or cookies due to a bad experience as a child with cookies with nuts in (that’s how we discovered she has a nut allergy)!  So the choice made itself really, as I fell upon the S’more Brownies page.  Brownie, fine, chocolate, fine, marshmallows, fine.  Being British I’ve never tasted a S’more, but as someone who has grown up on American books, tv shows and films, I’m aware of them as a campfire treat, consisting of marshmallow and graham crackers.  I have never been near a campsite, let alone a campfire, but I do love a good brownie.  The S’more brownie consists of a chocolate brownie base, a layer of digestive biscuits (we don’t have graham crackers in the UK), and a marshmallow topping.  I’m already salivating.
The bake

Take note, regular readers of this blog, that this time I followed the recipe ingredients exactly!  Except for one thing – I used 100g of dark chocolate instead of 120g.  But dark chocolate is pretty expensive, and most bars come in 100g blocks!  Sorry, two things – I used Stork margarine instead of unsalted butter.  But I use that as a butter substitute for most of my baking, except for when making buttercream frosting, as you can taste the butter in that!

As noted above, the S’more brownie has three main elements; brownie, biscuit, marshmallow.  And, to be honest, each of those steps is pretty simple.  The first step is to make the biscuit layer, by crushing digestive biscuits, and combining them with melted butter, in the same way you would the base for a cheesecake.
 
You put this to one side, then move on to the brownie mixture.  You start by melting butter and dark chocolate.  Most cookery books only give the bain marie method of melting it over a pan of hot water, but this book actually says about melting it in the microwave!  This is my preferred method, mainly as I don’t have a glass bowl to put over a saucepan.  You have to be careful not to burn the chocolate in the microwave – my tip is to only put it on medium heat, and in 30-45 second bursts.  Also, if after a few bursts it’s mostly melted but there are still a few lumps of chocolate, instead of putting it in for another 30 seconds and risk burning it, just stir it, and the heat tends to melt the rest.

Once the chocolate and butter is melted, the rest of the ingredients are added to the chocolate.  I had a couple of problems with this process – first one of the eggs cracked as I was trying to get it out of the egg box (egg white all over the kitchen), and after I’d mixed everything together a tube of coffee sweeteners fell into the mixture!  But eventually I had the brownie mixture, ready to go into the brownie tin.  The recipe tells you to line the tin with foil first, and make sure there’s enough foil sticking up at the edges.  Put the brownie mixture into the tin, then top with the biscuit.  You are meant to use an 8inchx12inch tin, but all I have is 8inchx8inch.  I hoped for the best.  Then bake for 30-35 minutes.  I cooked mine for 45 minutes as after 35 the middle was still raw, and even after 45 minutes it still didn’t pass the skewer test, but I had to persevere.

After the brownie is cooked, you top it with the marshmallows.  The brownie had risen quite a bit during cooking time, and the marshmallows were coming up right to the foil.  You then put the brownie tin back into the oven for the marshmallows to soften.  This is when all marshmallow-y hell broke loose, as I opened the oven door to see marshmallow oozing over all the edges, and a pool of molten marshmallow on the bottom of the oven, and dripping on the rack.  I put the tin onto a baking tray, and straight under the grill for the top to get the S’more chargrilled effect, but the marshmallow ooze-fest continued, leaving a not very aesthetically pleasing finished product.


I left it to cool/set for a good few hours before tucking in.  It looks quite impressive (in a disgusting kind of way), but it was a nightmare to cut from the foil, as the marshmallow had stuck to everything.  And the taste?  Underwhelming.  I’m not sure what it is, but it just doesn’t seem to have baked properly.  The brownie seems to be both over and undercooked.  The biscuit layer is soft rather than crunchy, and as so much of the marshmallow ended up over the sides, it’s quite a thin, yet sickly, layer.  I’m really disappointed, as this has been my first disaster from the book.  And my sister didn’t even like it!  Not that I really blame her.  I think the morals of this story are to make sure there’s plenty of excess foil around the edges, and if you have a smaller brownie tin than stated in the recipe, keep some back and make another batch, rather than cramming everything in.  Ah well, you live and learn. 
Hope you've had a more successful week of baking - happy baking!

Thursday, 25 April 2013

Week 8 – Cobbling it together…

Apple and Blueberry Cobbler

Initially I thought for this week’s bake I’d have to randomly select something from the recipe book, however, yet again, the reduced section of a supermarket came to my rescue, in the guise of blueberries!  I looked in the Index under Blueberries, and found 3 entries – Blueberry Loaf, Blueberry and Amaretto Trifle Cupcakes, and Apple and Blueberry Cobbler.  I immediately discarded the thought of the cupcakes, as I don’t like Amaretto.  I was all set to attempt the Blueberry Loaf – although bread making scares me, the point of this experience is to try new baking experiences.  However upon reading the recipe it looked a little fiddly, so I thought I’d look at the Cobbler recipe.  Being British I’m not used to the concept of Cobbler, however it seems to be a cross between a pie and a crumble.  I decided to plump for that, as I had everything except for the apples.  Also the recipe is super simple!  Facing my fear of making bread will have to wait another week (at least…).
The Bake

As noted above, I acquired the blueberries from the reduced to clear section.  Blueberries are normally quite expensive, so I snapped them up.  However I only bought one 125g packet of them, and the recipe called for 200 grams.  So I thought the best thing to do was halve the quantities.  This did work out better really as I have a small Le Creuset flan dish, and a massive Pyrex dish, but nothing really in-between, so making a smaller Cobbler would allow me to use the flame orange Le Creuset.

The first step is to peel and chop the apples (Bramley and Granny Smith), and add them, along with sugar and mixed spice, to a saucepan of melted butter, and allowing to soften.  I put the lid on as well to speed up the process.  Once softened, you stir the blueberries through, then put the mixture into the pie/flan dish.
 
Meanwhile, I made the dough.  It’s initially a standard crumble/breadcrumb consistency, but then you add boiling water, which immediately turns it into quite a gooey dough.  You then completely cover the fruit mixture with it, by adding balls of mixture to the top.  I was a little worried that as I had used half the amount of ingredients, it wouldn’t cover the fruit, so I had to spread it out a bit.  You then sprinkle brown sugar on top, and into the oven it goes.  I stuck to the stated cooking time of 35 minutes despite halving the quantities, as with my oven I normally need to increase the cooking time.


I could smell that it was ready before the timer went off, as the sweet aroma of the mixed spice filtered through the house.  And voilà - simple!  I think it looks great; like a tasty, homely dessert.  And it tastes homely too, and delicious.  The fruit is soft, and sweet, and the blueberries give the mixture a nice colour.  The dough/crust is quite surprising; it almost tastes like fried batter, crossed with crumble topping.  In a good way!  I still had some double cream left over from the Chocolate Malt Cake, so I ate it warm with some double cream.  Bliss.

Who knows what next week will throw up, but until then, Happy Baking!

Sunday, 21 April 2013

Week 7 – Well, just…


Chocolate Malt Cake


This week I wanted to combine my blog post with making my mother’s birthday cake, which was on Friday, but wasn’t required until Saturday, and I am writing/publishing on Sunday night.  Eeshk.  Anyway, luckily Home Sweet Home has a cakes section, and has a few pretty impressive looking celebration cakes.  My sister and I decided on the Chocolate Malt Cake, as it looked impressive, and my fussy-eater sister had no qualms about the ingredients.  This is a multi-step, multi-page recipe (even the ingredients go over the page!) and I only really had 3 hours to make it in.  The 3 main stages are making the fudge sauce, making the sponge, and making the frosting.  Three hours sounds like a lot, but it did mean I had to make sure I stuck to half hour segments – 30 minutes to make the fudge sauce, 30 minutes to make the sponge, 35 minutes for the cake to cook, 30 minutes to let the cake cool and prepare the frosting, 30 minutes to assemble.  This regiment meant there was less time wasted, but maybe things were a bit rushed…
The Bake

I have used all the correct ingredients this time, which resulted in quite a pricey supermarket shop actually.  However as I only have two sandwich tins, I couldn’t make it a three layered cake without having to wait for one tin to cook first, so I only used two thirds of the ingredients required – i.e if it said 120g, I used 80g, et cetera, et cetera. 
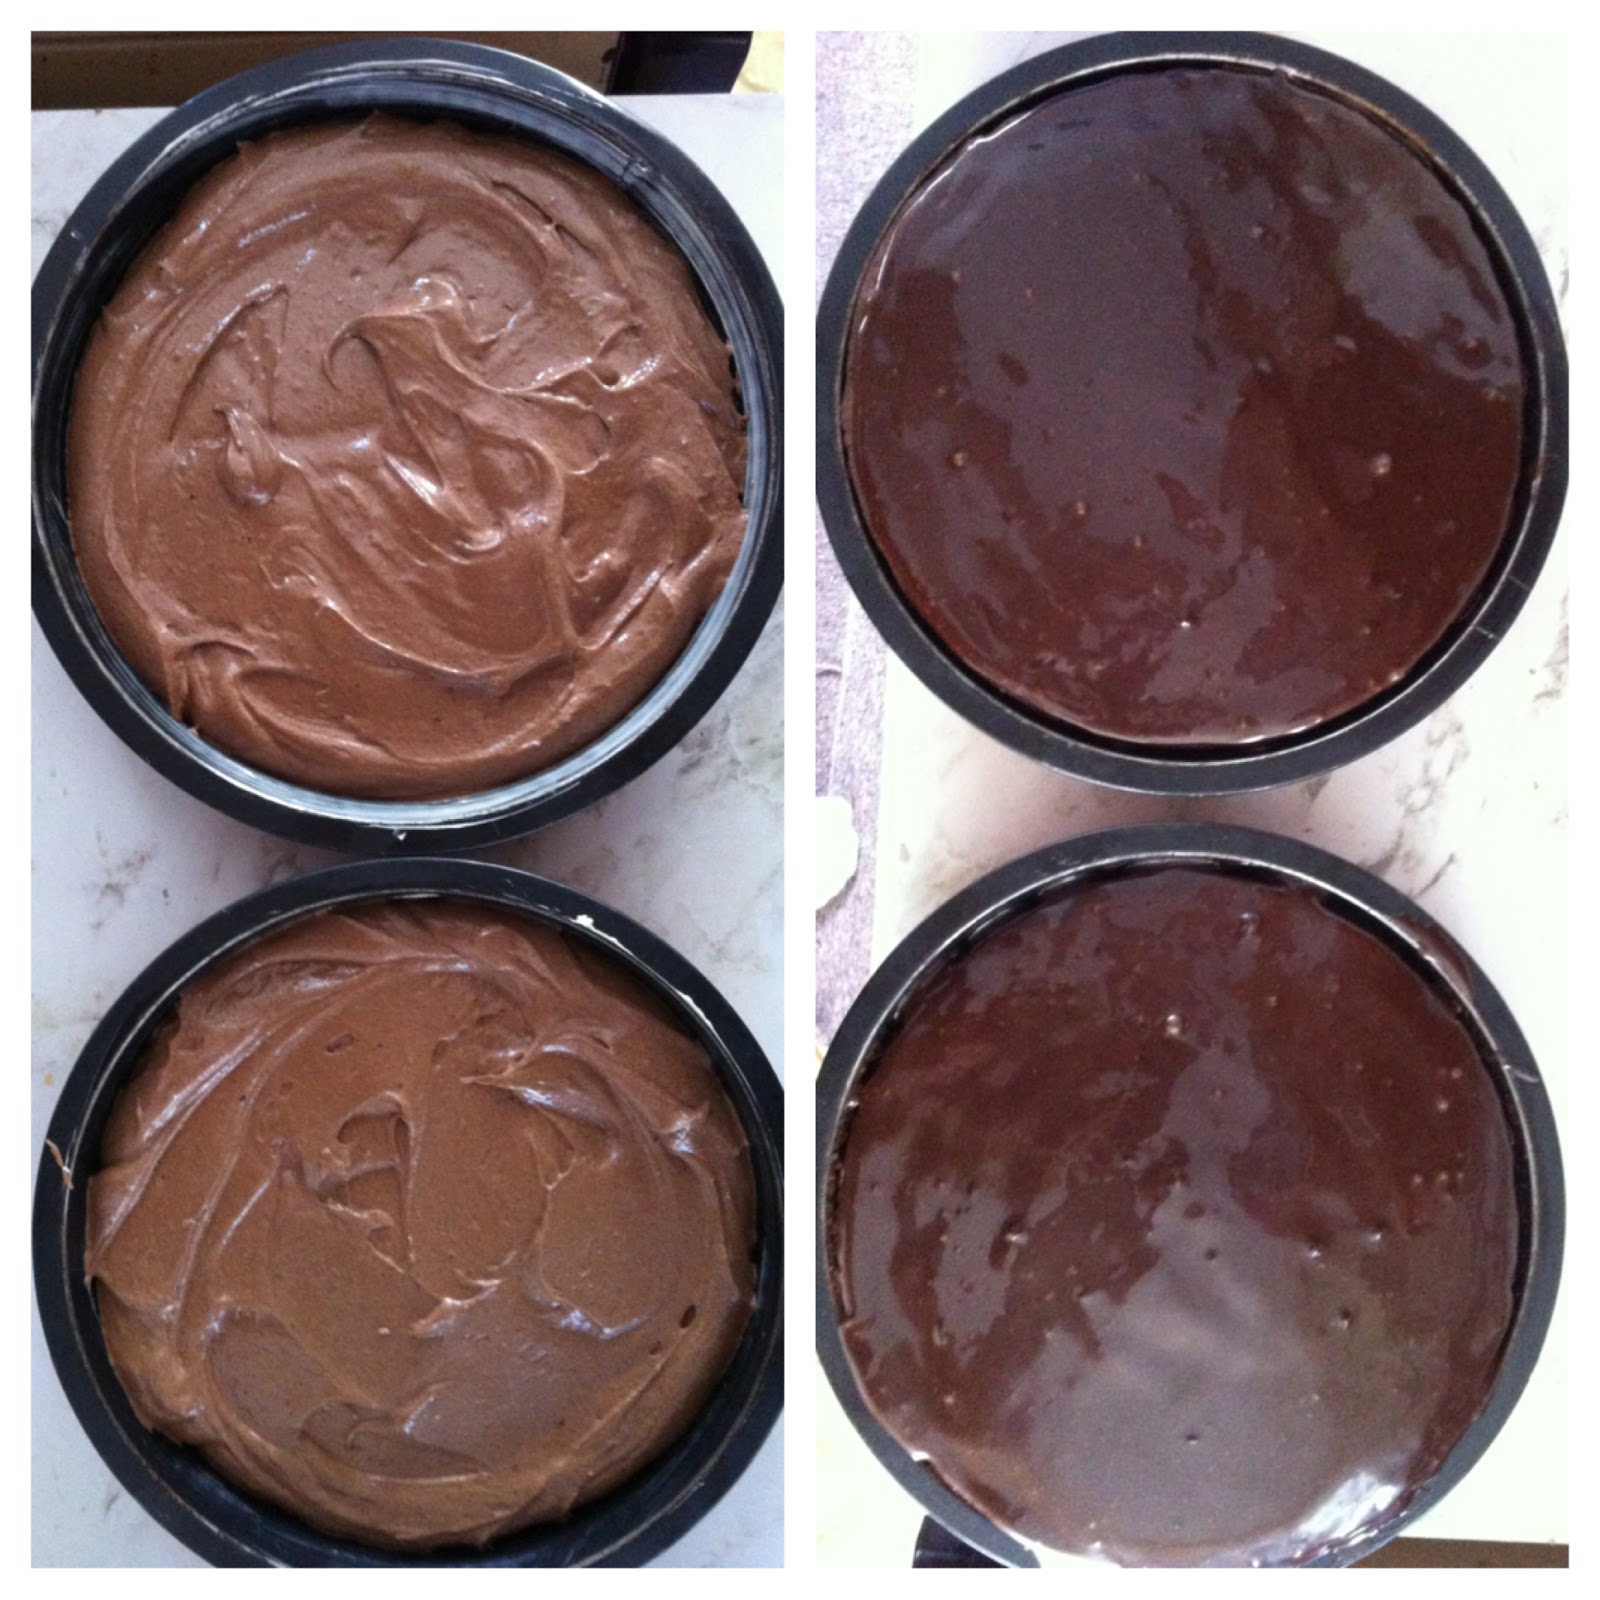
The first step was to make the chocolate fudge icing, which would be poured over the sponges.  This seemed like the most complicated part, and the bit that was most likely to go wrong, as it involved heating golden syrup, caster sugar and double cream in a saucepan, and letting it come to the boil, before adding it to a bowl of chocolate and cocoa powder.  I’m always apprehensive when things have to be heated this way, as there’s such a fine line between under heating and burning.  However, I think I got it right, as when adding the heated mixture to the dry ingredients, after a while it turned into a nice fudge sauce:


While the fudge mixture cooled, it was on to the sponge.  This was essentially a chocolate sponge mix, but with buttermilk – simple enough, and went into the oven and came out without problem.  After cooking for approximately 35 minutes, I allowed the cakes to cool a bit, and then poured the fudge sauce over both, before allowing to cool completely.


While they cooled, I made the frosting.  Now, whereas with the fudge sauce and sponge I used a third less than required, ingredients-wise, for the frosting I used half what was required.  I know from past experience with Hummingbird recipes that there’s always way too much icing, and as I was also using one less layer, I took my chances.  The recipe in the book called for 900 grams of icing sugar!  And even 450g seemed a lot.  When making the frosting, I was first to cream the icing sugar and butter, before adding a little cream cheese to loosen the mixture, before adding the remainder.  However, as my mixing bowl is quite shallow, and there was so much icing sugar, it wasn’t really incorporating the butter, so I added the cream cheese and then started mixing properly.  It then took on an icing consistency, yay.  It’s at this point that the ‘malt’ part of the cake’s title comes into play, as in a separate bowl you mix double cream with…malt powder!  Once it’s a thick mixture you fold it into the buttercream, and voilà, malt icing!  By now the sponges were cooled, buttercream frosting was ready, so time for assembly.

It was at the assembly point that I started to become a bit unstuck.  The sponges seemed cool, and the fudge sauce seemed to have set, but when I spread some frosting onto the first layer, it seemed to push the fudge sauce to the sides, and that and the frosting started oozing over the edges.  I heaped some crushed Maltesers onto the frosting, before approaching the upper layer.  I was afraid the same would happen with the top layer, so I put the top layer onto the bottom layer fudge sauce side down.  I think this might have worsened the oozing situation between the layers, but it did stop the fudge sauce and frosting mixing together on top and thus ruining the look of the cake.  I heaped the frosting on top, spread it along the edges, sprinkled the rest of the crushed Maltesers on top, and added a border of whole Maltesers.  I also tidied up the edges, which by now had quite a pool of frosting/fudge sauce.

In hindsight, maybe I should’ve let the sponges cool for a little longer, or even refrigerate them for a bit to allow the sauce to set.  However, to be honest, truly in hindsight, I don’t think I would add the fudge sauce at all.  It doesn’t really add to the taste, but did affect the overall aesthetic and effort required.  The cake did still look really impressive once completed, and talking of taste, it tastes great!  Although it is really rich, so have small slices!  It’s the frosting that really gives it the malt-ness, and makes you think ‘ooh this cake tastes like a Malteser!’  The sponge is moist, and the fudge sauce does lend a smoothness, although as already mentioned, I feel the cake would work just as well without it.


It’s back to being a completely random choice next week, so anticipation all around – happy baking!

Thursday, 11 April 2013

Week 6 – Exotic Rainy-Day Bake!

Pineapple Upside-Down Cake

*Please note I normally write this blog after finishing the bake, so everything’s in the past tense.  This week due to organisation and extended cooking time I am writing before, during and after the bake, so please excuse the different tenses!*

Today is a perfect baking day, as it is pouring down with rain outside.  Come to think of it though, living in Wales means that there are lots of perfect baking days.  As noted at the end of last week’s blog, this week I am making the Pineapple Upside-Down Cake, as I have a pineapple that I picked up for a heavily discounted price.  The recipe asks for pineapple juice and pineapple slices, but I hope my fresher way will work.  I’m hoping that when I cut the pineapple some juice will emerge… Stay tuned to see whether I rue not just throwing it in a blender with a banana to make a smoothie (although, come to think of it, my blender is broken).

The Bake

As you know, I have been caught out a couple of times in the past by not reading the recipe in its entirety before embarking on it.  So this time I read it all the way through.  However I needn’t, as it’s only 5 steps!  As noted above, my variations on Hummingbird’s recipe involve using an actual, fresh (ish) pineapple rather than slices and juice from a tin.  First things first, preparing the pineapple slices.  I armed myself with a sharp knife and started prepping.  I cut off both ends, and the sides.  Half of the pineapple was bruised but I only needed 6 slices, so I cut the bruised part, put it to one side, and cut 6 slices with the ‘good’ bit.  I cut out the middles, and with the bruised half, I made the pineapple juice.  I did this by basically squeezing it in my hand, over a jug.  And, you know what, it worked pretty well!  I had pretty much the 90ml the recipe asks for.


You then make the batter for the cake, which is essentially a standard sponge mix, but with no vanilla extract.  After creaming the butter and sugar, adding the eggs, then the dry ingredients, you add the pineapple juice.  When I first poured it into the mixing bowl it looked like it had curdled, but once I mixed it, it resembled cake batter again.  I tasted the beaters after I’d finished mixing (as is my right as the baker!) and the batter tasted like a standard sponge, but the pineapple juice gave it an extra bit of sweetness.  Before pouring the batter into the cake tin, you arrange the pineapple slices in a tin that has been greased, dusted with flour and coated with caster sugar.  When putting the slices in I realised 7 slices of pineapple would’ve been better, but 6 looks fine.  The batter is then poured in, and put into the oven for 35-45 minutes.

 
The cake is now in the oven, and will need to cook and cool a bit before I turn it out onto a plate, and hope that it looks and tastes as it should!  While I’m waiting though, thought I’d share with you that I’ve made this cake and written about it whilst listening to a ‘Back to the Nineties’ playlist on Spotify via Emerald Street, and it’s great.  It’s mostly female artists, and listening to it while baking has made me realise that this is what being a 21st century feminist is all about – it’s perfectly acceptable for me to do traditional domestic activities, on my day off from my job, whilst listening to kick-ass females sing about life, love, and ruling the world.  Girl power.  But I digress…
An hour or so later, and I have now taken the cake out of the oven, and let it cool.  While it’s been cooling though, it’s slowly been sinking, and once I turned it out onto a plate, it looked really concave.  And when I cut into it to take a slice, some juice/batter hybrid was oozing out the middle.  I’ve never made a fruit upside-down cake before, so I’m not sure if that’s what’s meant to happen, or if it just hasn’t cooked properly in the middle, so I’ve put it back in the oven for a bit, just on the plate.  I’m not worried about eating raw cake, but I don’t want to give anyone else food poisoning!  And, true to that, I have eaten the slice I cut.  It tastes nice – moist, fruity, and cooked, however I think it might be a tad underdone.  So my tip is to cook it for longer than it says, maybe 50-55 minutes.  I am a little disappointed, however I don’t normally cook with fruit, chocolate’s more my bag, so it’s been a learning experience.  Which is what this journey’s all about!

I'm not sure what I'll be making next week, but as it's my mother's birthday I think I'll try and make a celebration cake of sorts!  Happy Baking!

Saturday, 6 April 2013

Week 5 - Cookies!

Peanut Butter and Chocolate Cookies


This week I was back to looking through Home Sweet Home to find the first thing that popped out at me.  The book is divided into 7 chapters – Cupcakes; Cakes, Cheesecakes and Roulades; Cookies and Biscuits; Pies and Cobblers; Traybakes; Sweet Treats & Classic Puds; and Savouries.  I’ve cooked cupcakes and cakes, and the shortbreads I made in week 1 do come under the Cookies and Biscuits section, however the cookies were calling out to me.  Cookies seem simple enough, but I’ve had a few occasions where I haven’t spaced them far enough apart, and they’ve merged into one mega-cookie while cooking. So when I landed on the Peanut Butter & Chocolate Cookies recipe, I thought jackpot!  I still don’t have a rolling pin so the draw of this recipe was that as well as sounding delicious, it doesn’t require rolling out the cookie dough, you just roll the dough into balls by hand.  There’s a similar method in the Cake Days book for Snickerdoodles, which I highly recommend trying/baking, although they’re really moreish.  But back to this bake…


The Bake


The recipe doesn’t require anything too complicated this week, so I haven’t changed any of the quantities/ingredients.  Once again I learnt that I should really read the entire recipe before beginning, as the first instruction was to sieve the dry ingredients, so I added them all to the scales, however the recipe then tells you to cream the butter, peanut butter and sugar in a bowl.  How was I meant to measure out the butter, peanut butter and sugars when the scales bowl was in use?!  So I niftily put a plastic container on top of the weighing scales, and had to do some mental arithmetic.  Once the mixture was creamed, I added the egg (I also added the vanilla extract at this point, however I noticed that the recipe doesn’t say when to do this), mixed, then slowly added the dry ingredients.  The mixture at this point was way too dry to carry on using the hand mixer, so I moved to a wooden spoon.  The mixture was looking too dry full stop to be honest, so I added a little bit of water.  I then took little balls of the dough, rolled them in caster sugar, and laid them out evenly on a lined baking tray:


And after 15 minutes in the oven, they were done!  Simples.  However, little confession, I actually burnt the first set that went in the oven!  When I’m preheating the oven I tend to turn it right up in the hope it’ll heat to my desired temperature more quickly, however I forgot to turn it down once I’d put the cookies in!  Rookie error.  So the first batch are quite hard, but the second batch taste really good.  They were a bit hard too in my opinion, but I do like my cookies quite soft.  So really I should’ve taken them out earlier.  But chocolate and peanut butter is definitely a good taste combination.  They also look like cow pats in the picture, but that’s the lighting.  Probably.   Notice how I made sure a burnt one is in the picture rather than underneath?  So that you can see that we all make baking mistakes…

 
Now as you know I normally don’t reveal the chosen bake until the blog itself, mostly as I don’t tend to decide until the day I’m baking it, however I can exclusively reveal that next week I intend to make the Pineapple Upside-Down Cake!  When I was in the supermarket getting the ingredients for the cookies, they had a Pineapple Reduced to Clear for 40p (from £1.78!).  So as long as it is still edible next Thursday, that’s what I’ll be making.  Until then, Happy Baking!