Sunday, 30 June 2013

Week 17 – Birthday baking

Cookies & Cream Cupcakes

So, readers, let me let you into a little secret – today’s my birthday!  27.  I didn’t intend on baking today, but I have once again been disorganised with my days off, so here we are, the end of the week and I require a bake!  But I have done all my celebrating, so I can get stuck in.  I decided upon the Cookies and Cream cupcakes for this week as they sounded tasty, and they have quite a rustic look, as there are bits of cookie in the frosting!  Therefore they don’t need a delicate hand.
The bake

This time my amendments to the ingredients are limited to the type of milk – as usual, I have used skimmed instead of whole.  Also, the recipe says to use cookies such as Oreos or Maryland double choc chip.  One of my birthday presents was a big box of Oreos, so had I known I wouldn’t have bought any cookies.  As it happens I decided on using the Maryland cookies, as I thought they would be better in a bake.  Although the recipe is cookies and cream, and Oreos are really the only biscuit with cream!  But oh well.

Now, normally for sponge cakes the first step is to cream the butter and sugar.  However, for this the first step is to mix all the dry ingredients together, with the butter, until it reaches crumb consistency.  The mixture was still a bit dry for me to mix everything with the hand mixer without flour flying out of the mixing bowl, so I only roughly mixed it: 

I then added the milk and egg, which had been mixed in a jug.  Half of the mixture was added, then the mixture combined until smooth, and then the other half was added, leaving a smooth cake batter.  I then filled 12 cupcake cases with the batter, using an ice cream scoop for even, consistent cupcakes.  Before putting them into the oven, you put cookie quarters into each case, on top of the batter.  The recipe says to put 4 quarters in each, but I used 2-3 pieces. 

I used mostly large cases, and they are now baking, but they have spilled over the cases again, to form almost a super cupcake.  When this happened with the Salted Caramel cupcakes, I just chopped off the bits that had over spilled, but doing that will be more difficult with these, due to the bits of cookie on top!  They have now baked, and once cooled I did just break off the edges until they were more cupcake shaped.

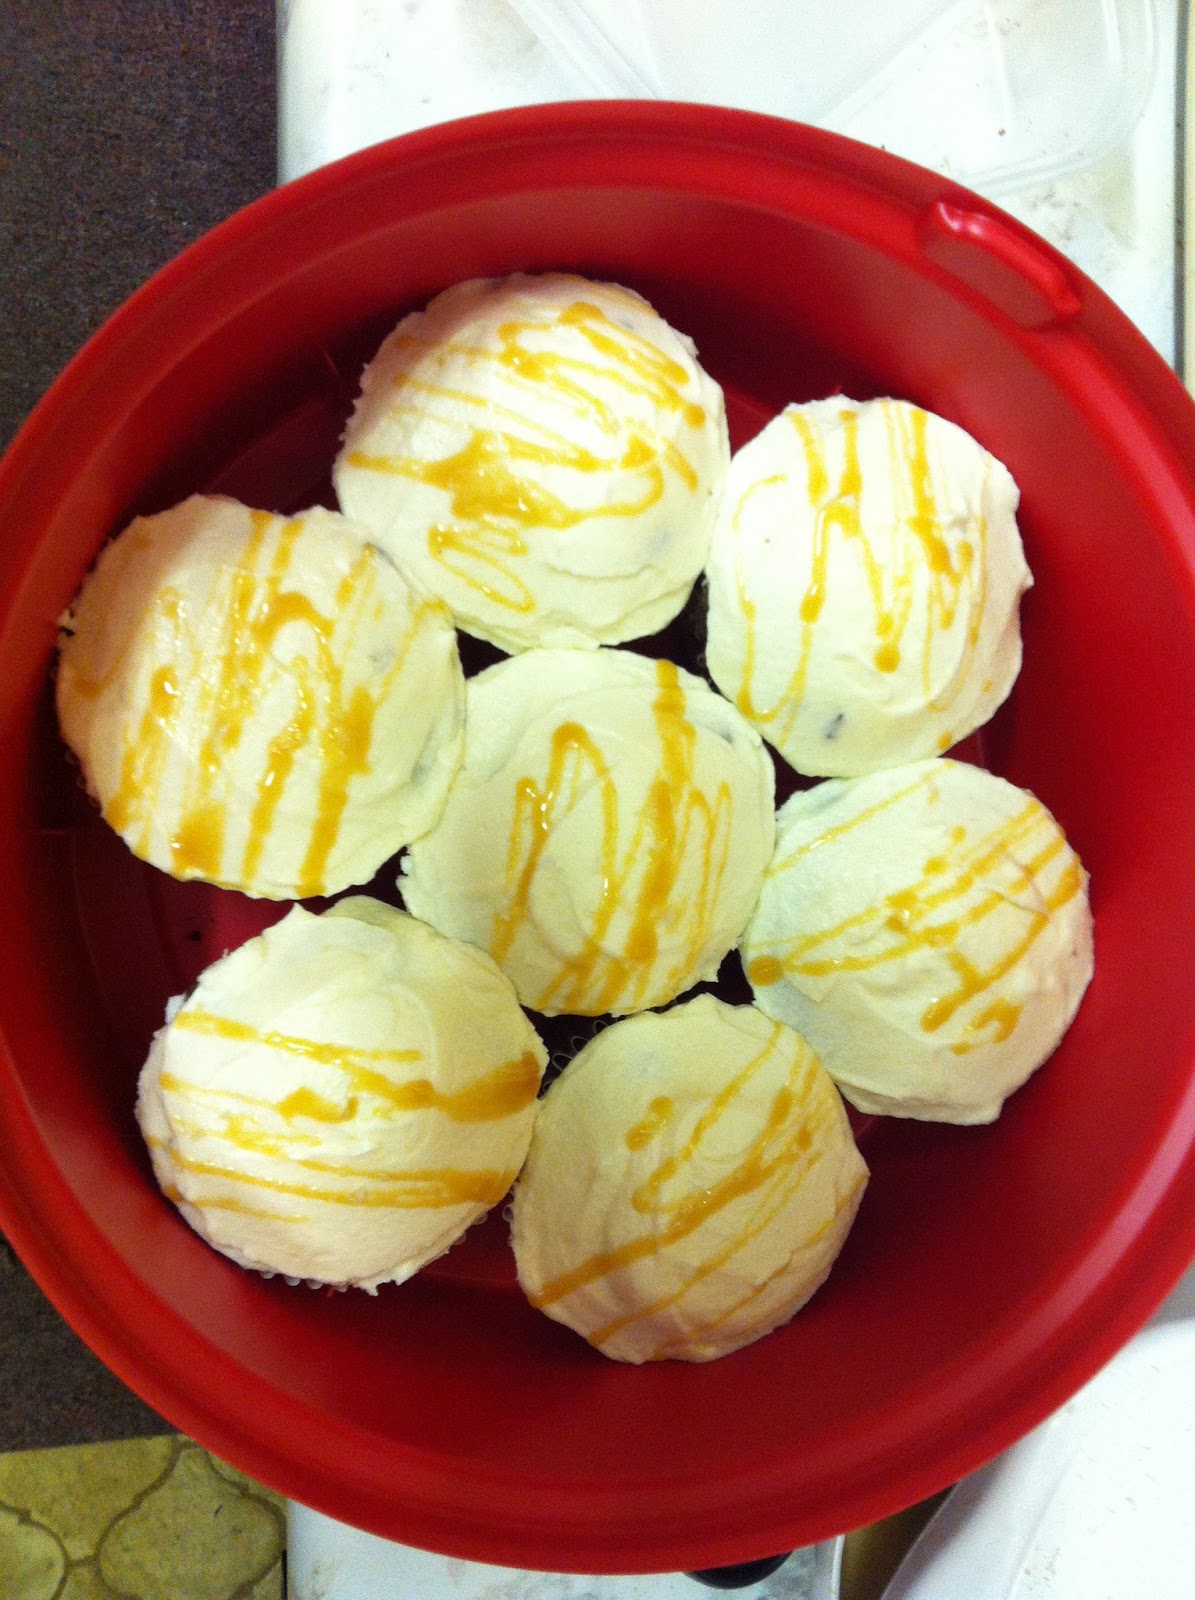
While they were cooling, and the second batch (I stretched the mixture to an extra 4 little cupcake cases), I made the frosting.  Super simple butter icing.  I only had 200g of icing sugar left, rather than the 500g in the recipe, but as you know I normally halve the frosting quantities anyway.  So I only used 40% of the required quantities of the icing sugar, butter, milk and crushed leftover cookies.  Mix well, then top the cooled cupcakes!  It is a bit more difficult to spread the icing due to the cookie bits, but do as I did and just plonk some icing on top, and spread what you can!  Once they’re frosted, I sprinkled more cookie crumbs on top.  And voilà, cookies and cream cupcakes.  They do look a bit rustic, but in a good way I feel.

As it’s quite late I haven’t tasted one, but I’ve tasted the individual components, i.e. sponge and frosting, and it was all tasty!  But I’ll put a more detailed taste breakdown in next week’s bake blog.  Until then, happy baking!

Tuesday, 25 June 2013

Week 16 – Backdated Baking!

Cinnamon and Peanut Twists

First of all, so sorry the blog is so late readers!  My broadband went down on Sunday night!  So couldn’t upload this in time.  However pure laziness is the reason it’s only actually up on Tuesday night!  However, fear not, I’m still counting this entry as week 16, so there will be another bake for week 17, before the end of the week!  I had a super busy week last week, so only had a couple of hours on Sunday night to bake, and wanted something straightforward.  But I feel like I’m saying that almost every week!  But I found something that was really straightforward – Cinnamon and Pecan Twists.  However, as I didn’t have pecans, and did have peanuts that I didn’t use to decorate last week’s Candy Bar Pie, I decided to adapt the recipe to Peanut Twists.  The blurb at the top of the recipe says any nuts can be used, so I followed their advice!

The Bake
As already noted above, I adapted the recipe by using peanuts instead of pecans.  But that’s the only amendment I made.  And that’s mainly due to the fact the recipe uses shop-bought puff pastry.  That’s right, shop bought pastry!  For a lot of bakers buying any element of the bake is a cardinal baking sin, but if the recipe tells you, it must be ok!?!  And I even had puff pastry in the freezer already.  The first step is to roll out the pastry until it’s 5mm thick, however this pastry was even pre-rolled!  It was flat then rolled on a piece of parchment paper, so after defrosting it all I needed to do was unravel it.  This also meant I didn’t need to make a mess sprinkling flour on the work surface.

Possibly the simplest first step so far?!  The next step is to chop the nuts.  I wasn’t really sure how I’d go about chopping the nuts, knowing that by just using a knife it could be time-consuming, dangerous and messy.  However I was using my mother’s kitchen, and thus utensils, and she suggested using her herb chopper-contraption.  It was great for the task at hand, as I could just go back and forth along the nuts on a chopping board.  Once chopped, the nuts are added to a mixture of soft brown sugar and cinnamon, mixed, then spread evenly across the pastry which has had an egg-wash, pressing the mixture down.

And that’s it for the ingredients and assembling.  The final step is to make the twists themselves.  I put baking paper on two baking trays, and then made 20 strips from the pastry rectangle.  I tried to make them equal/straight, but it wasn’t a complete success, with some thinner than others.  I was then to twist the pastry into spirals, and put them onto the baking trays.  With the first spiral, I discovered it was too long for the baking tray!  So I had to fold each one in half.  Some I folded with the mixture on the inside, and the other half with the mix on the outside, which you can sort of tell from the baking trays on the picture below.  Then leave to bake for 20 minutes.

I was a little worried how they would look once cooked since I’d folded them over, and thought maybe the ends would look a bit strange, but they turned out perfectly.  Golden brown and flaky.  The blurb suggests drizzling maple syrup over them, and I didn’t need to be told twice!  They taste really good too - again, flaky, and the brown sugar caramelises the nuts.  The maple syrup is a great addition too.  I recommend a couple with a cup of milk.  Happy baking!

Sunday, 16 June 2013

Week 15 – Father’s Day Bake

Candy Bar Pie

As you can maybe guess from the title, it’s Father’s Day today in the UK.  So, as I like to do, I wanted to combine this occasion with this week’s bake.  Now, the Hummingbird Bakery books do not look at all manly, with the pinks, flowers and hummingbirds gracing the cover and pages.  However, Inside Home Sweet Home there is a recipe for a Candy Bar Pie.  The candy bar in question is a Snickers, which is maybe the most manly chocolate bar?  So I thought this would do…
The Bake

This bake has 3 parts – the base, the filling, and the decoration.  This time I had a few amendments to the recipe: double choc Oreos (no particular reason, just they had been on offer) light cream cheese, no peanuts on top (more about that later), and melted chocolate chips for the chocolate drizzle decoration.  As I was using a smaller pie dish than the 9 inch one in the recipe, I took 10% off all measurements for the filling (I had already used the correct amounts of base ingredients when I realised there was too much for the pie dish, which is when I realised I should take a percentage away!).  To make the base, crush the Oreos and the digestives in a zip lock bag, then add melted butter, and press the combined onto the bottom and edges of the pie dish.  Refrigerate for an hour. 

While you’re waiting for that to chill, chop the Snickers’ into small slices.  I will admit, I used the supermarket own brand of ‘nutty bar’ rather than Snickers.  I think it was for the best, financially and cuisine-wise, as the peanuts in Snickers bars can be quite big!  You can also make the filling, by mixing the cream cheese and sugar, then adding sour cream, peanut butter, and the eggs.  Once the hour has passed, everything can come together, by adding the Snickers slices to the base, then coating with the filling mixture.  I made circles with my slices – I don’t think it matters, but it does look pretty and organised in the picture:

Now the pie is ready to go into the oven.  Even though I used 10% less of everything, I still had quite a bit of filling, and a few Snickers slices, left over.  So I filled 6 cupcake cases with left over mixture, and a slice of Snickers.  I realise there wasn’t a barrier between the filling and the base, like there is for the pie, but I couldn’t waste the mixture, or just consume it raw, myself.  So in it all went.

The recipe states it should be baked for 35-40 minutes, or until there’s only a bit of wobble to the filling in the middle.  I must say, even after 40 minutes, there was still a lot of wobblage (yes I just made that up).  I think it probably baked for closed to 50 minutes in the end.  But eventually it came out looking pretty good. 

It was then meant to cool, before being put into the fridge.  Unfortunately it hadn’t cooled for long enough before I had to go to work for a few hours, and then went for a Father’s Day meal, so it got to set at room temperature.  Once I returned from the meal, I made the decoration for the top.  Now, in the recipe the pie is topped with melted chocolate drizzle, and chopped peanuts.  I had a bag of peanuts all ready to go, however when my father saw that inside the pie was peanut butter and Snickers, retorted “you know nuts aren’t good for my asthma, right?”  So on his request, I omitted the peanuts from the decoration.  I put some leftover chocolate chips in a sturdy plastic container, before melting gradually in the microwave.  I then attempted to drizzle, but it was more glooping, and here’s the end result:

Looks quite impressive, and tasted good too!  Especially the filling, it’s creamy and smooth but some of the peanuts from the peanut butter give it a crunch, thus providing a texture contrast.  Dad enjoyed too.  I will say though, it’s basically a cheesecake, so not sure why it’s sold as a pie, but no matter, it’s all baking!  I think the addition of salted peanuts would’ve been good on top, as a further contrast – pairing the sweet with the salty.  But who am I to argue with my father’s health!  Until next time, happy baking!

Sunday, 9 June 2013

Week 14 – If You Can’t Stand the Heat…

Chocolate Truffle Cookies

The sun is still shining here in south Wales.  Shining hard, it’s been hot all week!  My poor pasty skin can’t handle it.  So I can’t stand the heat, but I won’t get out of the kitchen!  Although I didn’t want to spend too much time in the kitchen, so that I could enjoy the nice weather.  As much as you can enjoy it while plastering yourself with SPF 50.  So a super simple recipe this week – the method only takes up half a page in the book!  For those of you that don’t have the book, if you look at the cover on Amazon, or any other retailer, these cookies are in the jar on the top left of the cover.  Don’t they look like chocolate biscotti?!
The Bake

As I just mentioned, this bake is simples!  The only area I strayed from ingredients-wise was the alcohol.  That’s right, they’re alcoholic cookies!  The recipe asks for amaretto, however the only thing similar I could find in my own alcohol stash was a small bottle of liqueur called ‘nutcracker’ that I’d been given a couple of Christmases ago.  But it would have to do, as an alcohol that I assume has nuts in, from its title.
The first step is to combine the dry ingredients, so flour, cocoa and baking powder, and sugar, then rub in the butter until it’s a sandy consistency.  You can’t really get a sandy colour with cocoa powder in the mix, so I basically rubbed the ingredients together until the butter was properly incorporated.  The egg and alcohol is mixed separately in a jug, before adding to the bowl, and mixing.  The recipe says that although it might seem dry at first, it will come together after proper mixing.  And they were right!

Too right if anything, I felt my mixture was a bit too wet, even after chilling in the fridge for half an hour.  This opinion was vindicated when it came to forming the individual cookies, coating them in icing sugar and putting them on a baking tray.  It was difficult to get them into a round shape, and to not get bits of dough stuck in the bowl of icing sugar.  It was a messy conveyor belt, let me tell you.  However in the end I made around 22 little dough balls, before putting them into the oven for 12 minutes.
They look quite nifty, although it’s a shame I couldn’t get them in a more uniform ball-shape.  Now, as I said above, these biscuits look like biscotti to me, and as they contained amaretto (or were meant to), I thought they’d taste like biscotti.  So imagine my surprise when they were soft!  When it comes to large cookies, I do prefer soft and squigy-ness, however I think as they’re quite small it would’ve been better to be crunchy.  However they are truffle cookies, and you don’t tend to get crunchy truffles… You can’t really taste the alcohol, or nut, but it does add a bit of another taste dimension.  They taste good with a cup of coffee anyway, and as they’re so small it’s fine to take two!
Next week will be a Father’s Day special, but until then, happy baking!

Sunday, 2 June 2013

Week 13 – It’s all Peachy!


Peach Pie
So summer is finally on is way here in south Wales, with warm weather, long nights and actual sun!  So as tempting as it was to spend all my time outside, I returned to the kitchen to complete this week’s bake.  I chose this initially due to, as is often the case with me baking with fruit, I bought peaches from the reduced section in the supermarket.  There are two peach recipes in the book, Peach Cobbler and Peach Pie.  I decided to make the pie as I’ve already made a cobbler, and I need to make pastry more often; it, like bread, scares me.  However, after deciding I was going to make a Peach Pie, I read the ingredients,  weighed my punnet of fresh peaches, and realised I was going to need a lot of fresh peaches to make up the 700 grams required for the filling, so I went out and bought 2 tins of sliced peaches.  And at 32 pence each, it was probably less than I paid for the fresh peaches!
 
The Bake
For this recipe, I stuck to all the ingredients as listed, except I used margarine/vegetable spread instead of butter in the pastry.  Which leads me to the first step, making the sweet pastry.  First the flour and butter is combined to make a crumb consistency, before adding caster sugar and eggs.  Even after adding the eggs, the mixture seemed really dry, and wasn’t combining to make dough, so I added some water a dessert spoon at a time, until I was happy with the dough.  I think I may have added a little too much water though, as when I put it in cling film to rest in the fridge, it seemed a bit wet.  Handy tip, the recipe says to tip the dough onto a floured surface, before making a big dough ball, then wrapping it in cling film.  I pre- rolled out some cling film onto the worktop, then tipped the dough directly onto it, thus saving the worktop getting covered in flour before you need to roll out the pastry.
 
After the dough has rested in the fridge, you need to roll out the pastry.  This is where I encountered some problems, so it was handy my mother was around, to basically show me the correct pastry prepping ways.  The ball of dough was way too big to roll in one, so I split it in half, before rolling it until it was thin enough to receive my mother’s approval.  After putting the pastry in the pie dish, I sliced off the edges, keeping the offcuts for the top, then gave the whole case an egg wash (i.e. brush it with egg), and put it in the fridge, while turning to the filling.
 
The filling is actually really simple – drain the peaches, then mix them in the bowl along with cornflour, caster sugar, vanilla extract, cinnamon and nutmeg.  I’m not really sure why cornflour is needed, but it’s so rare that I need to use my cornflour, I’m grateful to see it in a recipe.  As I’d only used half the pastry, I wondered if I would only need half the filling, but the whole 700g of peaches fit into my Le Creuset pie dish. 

 
After filling the pie dish with the, well, filling, gather the offcuts from the pie base, and re-roll to make the crust.  Ease it over the top of the pie, brush with egg wash, sprinkle with caster sugar and put into the fridge (again) for a bit, before putting into the oven for an hour.  Oh, after cutting 3 slits into the pie.  This is where it’s sometimes nice to add some decoration with extra pastry, however my attempt at making a peach out of pastry looked silly, so I went for a simple cross on top.
 
One hour later, a perfectly cooked peach pie emerged from the oven.  I think it may have had more of an all-over golden look if I’d put more egg wash on the top of the pie.  However this didn’t affect the taste at all, the pastry was soft and moist, but not soggy, and the peaches were sweet with the spice a subtle addition.  It isn’t a showstopping bake, however it did taste like a well-cooked, homely fruit pie.  My main recommendation is to lessen the quantities of the pastry by around a third.  I could’ve used half as much, but I used a smaller pie dish, around 6 inches rather than the 9 inch pie dish the recipe says to use.  I had so much pastry leftover I made a whole other pie!  Well, an egg custard tart.  And there was still enough left over to make 12 small tarts, with egg custard and lemon curd filling. 
 
Everything did turn out well and tasted good, however with all the extra baking, and the resting of the dough and the pie, making the pie was quite time-consuming.  Luckily it was a leisurely Sunday afternoon!  Until next time, happy baking!

Sunday, 26 May 2013

Week 12, item 2 - The Main Event

Chocolate Shortcakes with a Peanut Butter Filling

Hmm, bit of a mouthful that title.  However the actual recipe was a lot less complex.  I looked through the cookbook a couple of times before deciding on this recipe – I wanted something that wasn’t a cupcake, a cookie, and not too intricate.  You may remember that I made the basic shortcake in the very first week of this adventure, and the result was ok, but I learnt to make the dough a lot thicker.  I already had most of the ingredients, which resulted in a quick and cheap trip to the supermarket, and it combined many delicious elements, mainly chocolate and peanut butter!
The bake

Incredibly, once again, I had all the main ingredients, except for using vegetable spread instead of butter, dark chocolate chips instead of milk chocolate chips (that’s what I had in the house), and I used light double cream (if such a thing really exists.  It seems like an oxymoron).  As I said above, the recipe was very simple.  All the dry ingredients are mixed together in a bowl, followed by the wet ingredients put together, then added to the dry ingredients, to make a rough dough.  The recipe says that there would still be some dry bits, but my mixture didn’t seem to be combining at all, so I did add a little bit of water to the mixture, just to make sure nothing flew across the room as I put the dough ball onto the kitchen surface, in order to mould into a flatter dough, to make six shortcakes.

I patted down the mixture until I felt it was flat enough.  And I actually had enough to cut out 9 shortcakes!  After keeping in the fridge for a bit for the dough to firm (the recipe states freezer but I didn’t have enough flat space), you brush the top with beaten egg, sprinkle it with demerera (or golden granulated as I did), then pop in the oven for 20 minutes.  As I needed a larger surface area I was using my mother’s kitchen, and she has a fan oven, so rather than having to add 10 minutes to the cooking time as I normally do, the cakes had cooked in the lower range of the recipe guidelines.  They looked good, although once again a bit thinner than I’d hoped, especially as they’ll be cut in half.


While they cooled, I made the filling.  With Hummingbird recipes I tend to halve the quantity needed for frosting, however as cream cheese was on offer anyway, I decided to go by the required quantities of cream cheese, peanut butter and icing sugar.

You may remember me saying that my sister has a nut allergy.  So this would be another thing that she would not be able to eat.  So in order for her to share in the shortcake consumption, before adding the peanut butter to the cream cheese and icing sugar, I halved two shortcakes and put in some filling sans peanut butter.  I did add more icing sugar than required to make it sweeter.  Once I’d split and filled those two, I added the peanut butter to the remaining cream cheese mixture.  You might have seen chocolate flavoured cream cheese, and this mixture is how peanut butter cream cheese would taste.

Once the shortcakes had cooled, I cut them all in half, and added probably two heaped teaspoons of mixture to half of the halves, as it were, before sandwiching them together. 


They’re basically chocolate scones, aesthetically and by taste.  That is, the cakes themselves are a little dry on their own, but with the filling there’s a nice texture contrast, and added moisture and sweetness.  The chocolate chips are a nice addition too, as they’re slightly melted from cooking.  So more of a success this time I feel.  Hopefully that will continue onto next week’s bake, but until then, Happy Baking!

Week 12, item 1 - Cake Pop disaster!

Leftover Cake Pops

Hmm, unfortunately the title of this blog post reveals how my cake pops turned out!  But I’ll still explain how I got there.  Now then, I had leftover chocolate sponge and buttercream from the Salted Caramel cupcakes I made last week, which, by the way, tasted amazing!  Maybe my most successful bake thus far from Home Sweet Home.  The icing had just a hint of the salt, so complemented rather than overpowered, and the caramel in the middle of the cupcake made the cake so moist.  I will however add the disclaimer that eating one did make my teeth hurt.  So be warned, it contains a lot of sugar.  But back to the leftovers. 

In the past I may have just eaten the offcuts and buttercream leftover separately (but eaten them nonetheless).  However, in the past year or so, the new baking trend, along with whoopee pies, seems to be cake pops.  You can even buy a cake pop maker.  However I don’t feel that they’re the proper cake pops – they’re just balls of sponge.  Whereas I first heard of cake pops being made by crumbling sponge that you’d made.  Which seems wasteful, but quite handy really if you have leftovers.  Due to my piqued interest in cake pops, for Christmas last year, Santa brought me a cake pop stand, sticks, and glitter/decoration for cake pops.  So I’ve really needed an opportunity to make them to be honest!  Firstly I crumbled the sponge, then just added it to the buttercream, and mixed.  I then made the mixture into little chocolatey balls (insert joke here), and put a stick in the middle (again, insert joke…).  I managed to make 6 from the mixture.  I put them in the freezer for a bit so that they would firm up, and be easier to coat.  While they were firming up, I turned to make the topping, which is where disaster struck…
Rather than use royal or fondant icing for decoration, as this was just an experimental first foray into cake popping, I wasn’t that worried about the coating.  I used another present from Santa, a bag of Renshaw’s toffee melts.  I didn’t intend on using the whole bag as I only had 6 pops, so I just put some melts into a small ceramic bowl, and blasted them in the microwave in 30 second bursts.  Being melts I assumed that they would, well, melt, but they took ages!  And once they had melted, they seemed to have burnt.  As a result the melt goo didn’t stretch very far, and made the cake pops look really sloppy.  Sad times.  However the taste wasn’t half bad, with or without the coating.  Although, again, sugar packed and therefore super sweet, so brush your teeth afterwards!  I will definitely make cake pops again, but maybe with a little more thought behind them next time.


Sunday, 19 May 2013

Week 11 – Happy World Baking Day!

Salted Caramel Cupcakes

As I said in my previous post, I had this week off, so intended on trying something a little more complex.  I also found out earlier in the week that today, Sunday 19th May, is World Baking Day!  So I thought that despite having the whole week to bake, I would wait until today, to make my endeavour more global, in keeping with the fact this blog is on the World Wide Web.  The official World Baking Day activity was to pick something from the website according to your baking ability, however nothing from any of the abilities really screamed out ‘bake me!’ so I thought I’d stick to the book, literally.  But then I had the dilemma of what to cook.  As I was going to be baking today, and I already had plans for earlier, the recipe could no longer be too complex, so I decided to go for Salted Caramel cupcakes.  This week has been quite a caramel filled week to be honest – while in London on Wednesday my sister and I called into Paul A. Young chocolate shop in Soho, and he makes amazing salted caramel chocolates.  We then had Salted Caramel Carte d’Or ice cream on Friday, and today in Starbucks I tried the new Triple Caramel Frappuccino (in stores tomorrow I think).  That drink has put me on a sugar high all day!  So really it was a natural decision.
The bake

The cupcake sponge itself is basically a chocolate cupcake, and the salted caramel part comes from the filling and the frosting.  For the cupcake bake, I am following the ingredients to the letter!  Except for using skimmed milk instead of whole milk.  Often with cake/sponge recipes in the Hummingbird cookbooks, you cream the butter and sugar together first, then add the dry ingredients, but in this instance you added all the cupcake ingredients, minus the milk and eggs, into a bowl and mixed until they resembled crumbs:

 
You then mixed milk and eggs in a jug, and gradually added it to the bowl, until you had the cupcake mixture.  And that’s it!  Definitely not complex, sorry guys!  I decided to use muffin cases rather than my usual small cupcake cases, and as a result the batter filled the 12 cases exactly.  However, turns out I overfilled – can you see how the cakes have spilled over the sides!  So although it did mean I didn’t have to do another batch, next time I would fill the cases halfway rather than two-thirds/three-quarters of the way.  So that they would look more uniform once I’d put the frosting on them, I cut off any edges that went beyond the standard cupcake shape, and put them to one side (I hate waste!).

Once the cakes have cooled completely, you add the first caramel element to the cupcake.  I’ll say now that the recipe asks for dulce de leche, or caramel sauce.  My local large supermarket didn’t have what I was looking for (turns out every little doesn’t always help), but thankfully my mother had an opened jar of caramel sauce that she’d picked up from Aldi once.  Aldi no longer had the sauce in question.  I have definitely seen dulce de leche in a supermarket before, so it’s probably worth just keeping an eye out!  Anyway, to add the sauce to the cake, you employ the same method as I used when adding the orange marmalade to my Jaffa Cake cupcakes.  That is, to cut a circle in the cupcake with a sharp knife, take that bit out, fill the gap halfway with caramel sauce, then replace the bit of cake in the hole.  The cake does need to be level, so I tend to cut half of the sponge bit off.  I added that to my pile of cupcake edges from earlier.  The trick with putting the cake bit back in is to make sure you’re putting it back in the same way it came out, so the cake looks like it hasn’t been touched.  As you then add frosting it doesn’t matter aesthetic-wise, but it does make a level cupcake!

 
Then it’s time for frosting.  As noted in previous blogs, Hummingbird recipes tend to require a lot of icing sugar (670 grams for this one!) so as usual I halved the quantities.  It’s a standard buttercream, so you add icing sugar, softened butter and milk, then add some dulce de leche, and some sea salt!  This is where the salt comes in.  The recipe says ‘a pinch’, but maybe add a little bit at a time, and taste.  I put my definition of a pinch in, but found I couldn’t taste any salt at all, and although I know it should be a subtle complement to the caramel, it’s no good not being able to taste it at all!  So I added a little bit more.  Once they’ve all been frosted, swirl a bit more caramel sauce on top, and a small sprinkling of the sea salt.

Voilà!  Don’t they look great?  I’m not the best when it comes to decorating the cakes, and need to hone my palette knife technique, however by adding the swirl of caramel on top it gives them quite a sophisticated look!  Unfortunately I haven’t had a chance to taste one yet – I’m still on a sugar high, and it’s almost 11pm so if I have one now I’ll never get to sleep… However, I have a bit of a treat in store for you – as I said I hate waste, and have enough sponge offcuts and excess frosting to attempt cake pops!  So once I’ve made those I’ll share my method/results with you, and by then I will have definitely tasted a cupcake.  Ooh so much suspense!  So until then, happy baking!

Sunday, 12 May 2013

Week 10, C is for cookie. And cornflake. And chocolate…

Cornflake Cookies

My choice for this week comes from a leftover ingredient from a previous week – malt powder!  It wasn’t an intentional choice, but I bought a big jar of it for the Chocolate MaltCake, and still have a lot left.  And although you wouldn’t think so, these cornflake cookies contain malt powder(as well as chocolate)!  I can’t think of many other recipes that will help me use it up… I also wanted quite a simple recipe.  The last time I made cookies, I overcooked them a little, so my aim this time was for a soft cookie, but with a little bit of a crunch from the cornflakes.
The Bake

First of all, my amendment to the recipe is halving the quantities.  It wanted 400 grams of flour for the cookie dough, but I only had 300 grams.  The recipe consists of two main parts – preparing the cornflake mixture, making the cookie dough, then merging them for the final cookie mix.  You might think that you could just add cornflakes straight to the mixture.  But you’d be wrong.  You actually mix cornflakes with malt powder, caster sugar and salt, then coat in melted butter, and bake the mixture for 15 minutes, or until the mixture is ‘crispy’.   My end product, however, looked a bit like a giant Anzac biscuit.  Once it cooled I prised it from the glass tray but it still wasn’t crispy, more gooey. 

While the cornflakes were baking, I made the cookie dough, which is a standard cookie dough mix, with chocolate chips added.  It was all very simple.  I then added the cornflake mixture to it.  The recipe said to use two tablespoons of dough for each cookie, but for the first batch I used an ice cream scoop.  As a result I only had 5 cookies on a tray when I put them in the oven for 15 minutes.
 
As you can see, the cookies are quite big!  So they weren’t adequately cooked after 15 minutes.  I wanted them soft, but not raw!  So back in they went for 5 more minutes.  For the second batch I used a dessert spoon, to get smaller cookies which would cook faster! (I was running late for badminton…)  These turned out more like what I had in my head.

The cookies are really soft, even when cooled, and still so a few days later.  The chocolate cookie element tasted really good, and the chocolate chips had melted a little, giving a smooth, rich flavour, but the cornflake detracted from the taste more than anything.  As the cornflakes weren’t crispy, there wasn’t a texture contrast, and there wasn’t a distinctive taste, so it had no real purpose!  So although the cookies disappeared quite quickly, I think next time I’ll just make chocolate chip cookies.  I’ll have to find some other recipes using malt powder!

I have a week off next week, so hopefully that will lend itself to an interesting, complex and time consuming bake.  Until then, happy baking!

Sunday, 5 May 2013

Week 9 – S’more, s’more!

S’more Brownies

This week my only pre-requisite for choosing the recipe was to ‘make something my sister likes’.  This task isn’t as simple as it sounds as she is very fussy about food.  And has a nut allergy.  It’s surprising how many of the recipes in Home Sweet Home contain nuts.  She also doesn’t really eat fruit, or cookies due to a bad experience as a child with cookies with nuts in (that’s how we discovered she has a nut allergy)!  So the choice made itself really, as I fell upon the S’more Brownies page.  Brownie, fine, chocolate, fine, marshmallows, fine.  Being British I’ve never tasted a S’more, but as someone who has grown up on American books, tv shows and films, I’m aware of them as a campfire treat, consisting of marshmallow and graham crackers.  I have never been near a campsite, let alone a campfire, but I do love a good brownie.  The S’more brownie consists of a chocolate brownie base, a layer of digestive biscuits (we don’t have graham crackers in the UK), and a marshmallow topping.  I’m already salivating.
The bake

Take note, regular readers of this blog, that this time I followed the recipe ingredients exactly!  Except for one thing – I used 100g of dark chocolate instead of 120g.  But dark chocolate is pretty expensive, and most bars come in 100g blocks!  Sorry, two things – I used Stork margarine instead of unsalted butter.  But I use that as a butter substitute for most of my baking, except for when making buttercream frosting, as you can taste the butter in that!

As noted above, the S’more brownie has three main elements; brownie, biscuit, marshmallow.  And, to be honest, each of those steps is pretty simple.  The first step is to make the biscuit layer, by crushing digestive biscuits, and combining them with melted butter, in the same way you would the base for a cheesecake.
 
You put this to one side, then move on to the brownie mixture.  You start by melting butter and dark chocolate.  Most cookery books only give the bain marie method of melting it over a pan of hot water, but this book actually says about melting it in the microwave!  This is my preferred method, mainly as I don’t have a glass bowl to put over a saucepan.  You have to be careful not to burn the chocolate in the microwave – my tip is to only put it on medium heat, and in 30-45 second bursts.  Also, if after a few bursts it’s mostly melted but there are still a few lumps of chocolate, instead of putting it in for another 30 seconds and risk burning it, just stir it, and the heat tends to melt the rest.

Once the chocolate and butter is melted, the rest of the ingredients are added to the chocolate.  I had a couple of problems with this process – first one of the eggs cracked as I was trying to get it out of the egg box (egg white all over the kitchen), and after I’d mixed everything together a tube of coffee sweeteners fell into the mixture!  But eventually I had the brownie mixture, ready to go into the brownie tin.  The recipe tells you to line the tin with foil first, and make sure there’s enough foil sticking up at the edges.  Put the brownie mixture into the tin, then top with the biscuit.  You are meant to use an 8inchx12inch tin, but all I have is 8inchx8inch.  I hoped for the best.  Then bake for 30-35 minutes.  I cooked mine for 45 minutes as after 35 the middle was still raw, and even after 45 minutes it still didn’t pass the skewer test, but I had to persevere.

After the brownie is cooked, you top it with the marshmallows.  The brownie had risen quite a bit during cooking time, and the marshmallows were coming up right to the foil.  You then put the brownie tin back into the oven for the marshmallows to soften.  This is when all marshmallow-y hell broke loose, as I opened the oven door to see marshmallow oozing over all the edges, and a pool of molten marshmallow on the bottom of the oven, and dripping on the rack.  I put the tin onto a baking tray, and straight under the grill for the top to get the S’more chargrilled effect, but the marshmallow ooze-fest continued, leaving a not very aesthetically pleasing finished product.


I left it to cool/set for a good few hours before tucking in.  It looks quite impressive (in a disgusting kind of way), but it was a nightmare to cut from the foil, as the marshmallow had stuck to everything.  And the taste?  Underwhelming.  I’m not sure what it is, but it just doesn’t seem to have baked properly.  The brownie seems to be both over and undercooked.  The biscuit layer is soft rather than crunchy, and as so much of the marshmallow ended up over the sides, it’s quite a thin, yet sickly, layer.  I’m really disappointed, as this has been my first disaster from the book.  And my sister didn’t even like it!  Not that I really blame her.  I think the morals of this story are to make sure there’s plenty of excess foil around the edges, and if you have a smaller brownie tin than stated in the recipe, keep some back and make another batch, rather than cramming everything in.  Ah well, you live and learn. 
Hope you've had a more successful week of baking - happy baking!

Thursday, 25 April 2013

Week 8 – Cobbling it together…

Apple and Blueberry Cobbler

Initially I thought for this week’s bake I’d have to randomly select something from the recipe book, however, yet again, the reduced section of a supermarket came to my rescue, in the guise of blueberries!  I looked in the Index under Blueberries, and found 3 entries – Blueberry Loaf, Blueberry and Amaretto Trifle Cupcakes, and Apple and Blueberry Cobbler.  I immediately discarded the thought of the cupcakes, as I don’t like Amaretto.  I was all set to attempt the Blueberry Loaf – although bread making scares me, the point of this experience is to try new baking experiences.  However upon reading the recipe it looked a little fiddly, so I thought I’d look at the Cobbler recipe.  Being British I’m not used to the concept of Cobbler, however it seems to be a cross between a pie and a crumble.  I decided to plump for that, as I had everything except for the apples.  Also the recipe is super simple!  Facing my fear of making bread will have to wait another week (at least…).
The Bake

As noted above, I acquired the blueberries from the reduced to clear section.  Blueberries are normally quite expensive, so I snapped them up.  However I only bought one 125g packet of them, and the recipe called for 200 grams.  So I thought the best thing to do was halve the quantities.  This did work out better really as I have a small Le Creuset flan dish, and a massive Pyrex dish, but nothing really in-between, so making a smaller Cobbler would allow me to use the flame orange Le Creuset.

The first step is to peel and chop the apples (Bramley and Granny Smith), and add them, along with sugar and mixed spice, to a saucepan of melted butter, and allowing to soften.  I put the lid on as well to speed up the process.  Once softened, you stir the blueberries through, then put the mixture into the pie/flan dish.
 
Meanwhile, I made the dough.  It’s initially a standard crumble/breadcrumb consistency, but then you add boiling water, which immediately turns it into quite a gooey dough.  You then completely cover the fruit mixture with it, by adding balls of mixture to the top.  I was a little worried that as I had used half the amount of ingredients, it wouldn’t cover the fruit, so I had to spread it out a bit.  You then sprinkle brown sugar on top, and into the oven it goes.  I stuck to the stated cooking time of 35 minutes despite halving the quantities, as with my oven I normally need to increase the cooking time.


I could smell that it was ready before the timer went off, as the sweet aroma of the mixed spice filtered through the house.  And voilà - simple!  I think it looks great; like a tasty, homely dessert.  And it tastes homely too, and delicious.  The fruit is soft, and sweet, and the blueberries give the mixture a nice colour.  The dough/crust is quite surprising; it almost tastes like fried batter, crossed with crumble topping.  In a good way!  I still had some double cream left over from the Chocolate Malt Cake, so I ate it warm with some double cream.  Bliss.

Who knows what next week will throw up, but until then, Happy Baking!